Table of Contents
OVERVIEW
Prairie View A&M University uses the WordPress Content Management System. This documentation outlines how Prairie View A&M Web Editors can create and update content using Layouts. The instructions included are intended for references only.
GUIDELINES
Standardization of the Prairie View A&M University web pages ensures that the same “look-and-feel” is maintained throughout the university website. Thus, allowing users to focus on the site’s functionality and information, without distraction. Furthermore, the constraints on the site’s structure and content, helps web Editors to better organize their website. Please follow the following guidelines when working with website content:
For Text
- Put the most important information first on a web page
- Focus on customer needs
- Divide your content for Students, Faculty and Staff
- Break content into short paragraphs and use bullets
- Use clear titles
- Use words in the text that end users will search for
- Give the end user (student, faculty, or staff) an action item (this is what you do next)
- Have FAQs – Q&As
- Check and double check your content
- Never format your text using the spacebar to create indents. Text should be formatted using the toolbar provided in WordPress.
- Provide Keywords and Descriptions of any new pages you create. This makes your pages searchable in the search engines.
For Images
The image file types that are permitted to be uploaded include .GIF, .JPG, and .PNG. Files should be added to the media library using the following folder structure:
<Area_of_Website>/<yourEvent>/<ImageName>
For example,
Projects/ProjectX/tools.jpg
For Documents
All Web file and directory names must be lower case and not have special characters. A special character is a character that is not part of the lower-case alphabet (a-z) or integer numbers (0-9). Web file and directory names cannot have spaces. Spaces within a file or within a directory name can be replaced with the dash character “-” (without the quotes). The reason for omitting spaces from web files and directory names is that Web Browsers and Search Engines do not expect spaces in URLs. In some systems, such as Linux (used by Web servers), mywebpage.html and MyWebPage.html would be considered two different files. All file formats should be converted to PDF format before uploading to the website and not be uploaded as a Microsoft Word or Microsoft Excel document. Luckily, you can save your document as a PDF directly from Microsoft Word and Microsoft Excel.
For Directories
It is recommended that the directory structure for a website in the Media Library be as follows:
- Forms directory
- Reports directory
- Training directory
- Events directory
- Services (where applicable)
- Projects (where applicable)
For Accessibility
Accessibility is the degree to which a product, device, service, or environment is available to as many people as possible. Accessibility can be viewed as the "ability to access" and benefit from some system or entity. The concept often focuses on people with disabilities or special needs (such as the Convention on the Rights of Persons with Disabilities) and their right of access, enabling the use of assistive technology. Accessibility is about making things accessible to all people (whether they have a disability or not). An alternative is to provide "indirect access" by having the entity support the use of a person's assistive technology to achieve access (for example, computer screen readers). The following guidelines improve accessibility on our University Website:
- You must have a color contrast for people to read it. (for example, gray fonts on white background is more difficult to see and read)
- Alt-text must be placed on ALL images (pictures, graphs, logos, etc.) in order to convey what is in the image).
- Styles such as Headings, sub-headings and body text should be used with every document.
- Font types and sizes should not be hard to read and understand.
- Never print to PDF for making your document a PDF – use the Adobe PDF tab on your ribbons or save as and make it a PDF.
- A scanned document is not easily read by a screen reader.
- A document should be checked for spelling, grammatical and accessibility errors prior to publishing its content.
For Compliance
Certain content is not allowed on the PVAMU servers. This includes plagiarized text, copyright infringements or any material that is not compliant with current state and/or federal laws.
WEB PAGE LAYOUTS
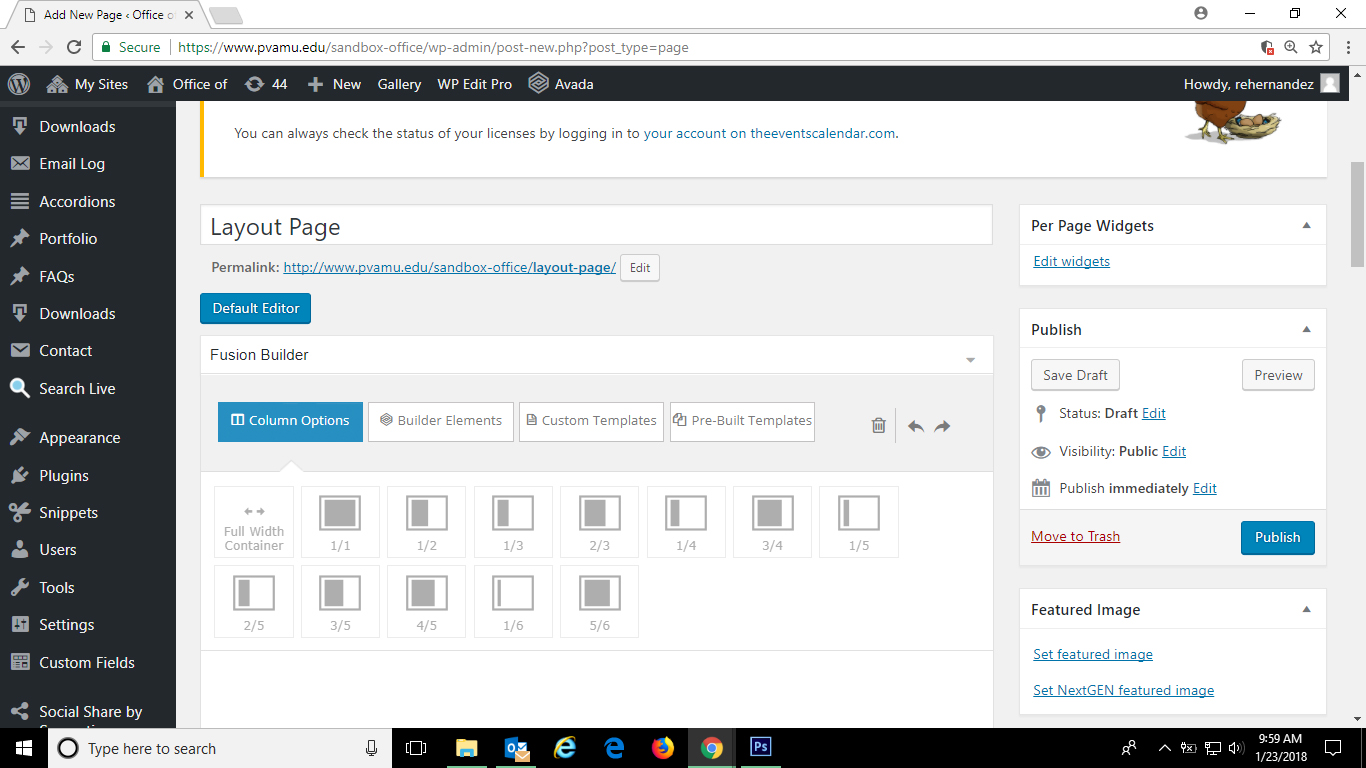
Sometimes you have enough content that you want to display the content in multiple columns (like a magazine or newspaper). Yo may want 3 images side by side such as in a visual menu. Or you may want an image in the middle with text on either side. Using the standard Visual Editor, achieving this would take knowledge of html, css and programming. However there is a tool that allows you to create visual layouts easily by drag'n'drop without the need to program. The Layout tool that we will use in the training session is titled Fusion Builder. The tool allows you to easily and accurately drag and drop page content to your precise location, making the page building process of complex designs, easier and faster. When you create a page, you will notice a blue icon located above the editor labeled Fusion Page Builder. Clicking on the button will switch the Visual Editor with the Layout Editor (Fusion Page Builder). If clicked, the blue button also changes title to Default Editor. Pressing on this Default Editor button will revert the editor back to the original default Visual Editor.
Column Options
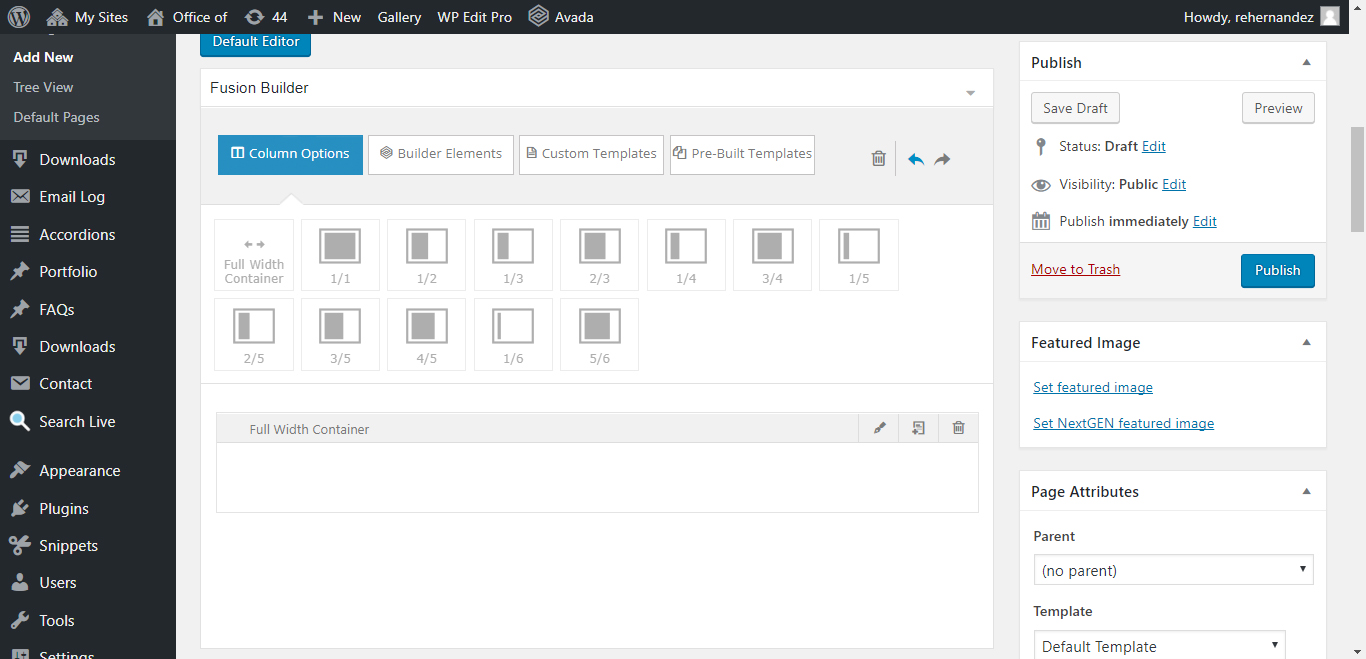
By default the Column Options tab is shown when you switch the editor to Fusion Page Builder. You can think of a page being built like a table, with rows and columns. You split a page into rows and inside those individual rows you create the columns for that particular row. In the Layout tool, you create rows by dragging and dropping the 'Full Width Container' element into the area below the elements. The result is the creation of a row on your page as shown below. The row expands the full width of the page and is labeled Full Width Container.
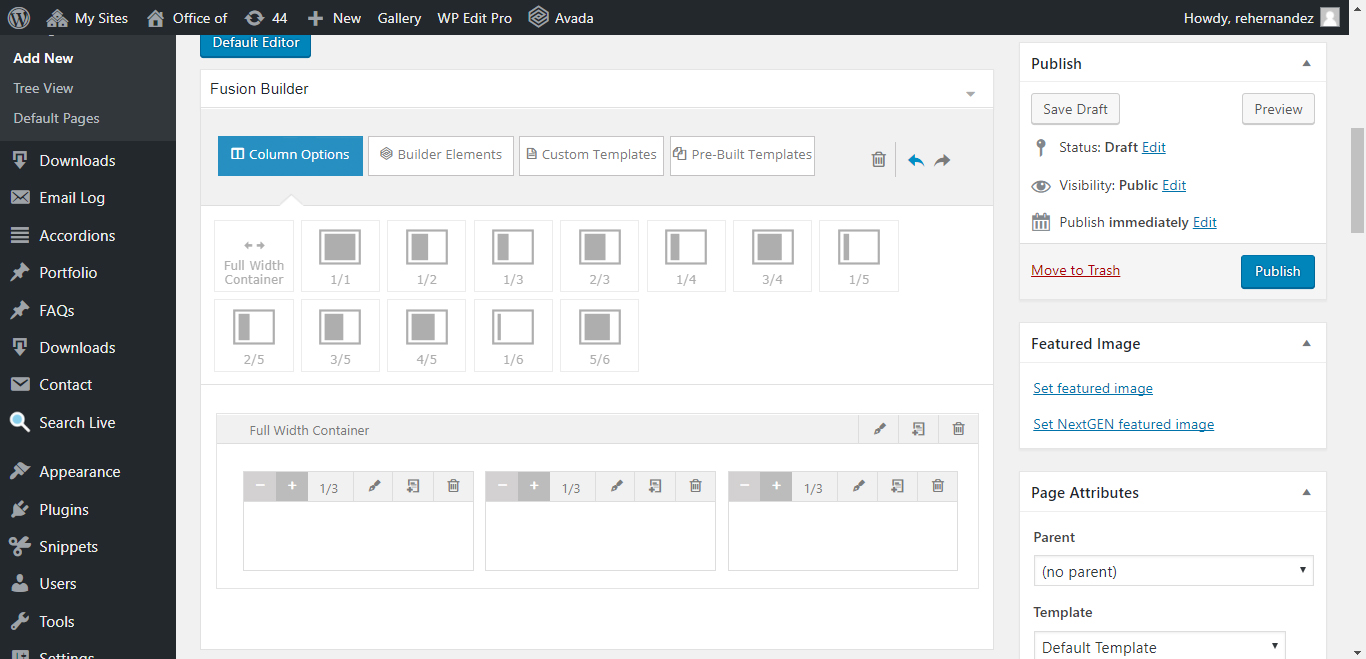
Once you have created a row you will want to split the row into columns. To do that simply drag-n-drop a block according to how much space you want the column to use on that row. For example, if you want to have two columns side by side, you will drag two blocks labeled 1/2 onto the row. However, if you want to split the row into three columns, you will drag three blocks titled 1/3 onto the row. The result is seen in the figure below.
You can keep adding as many rows as you need to the page and splitting each row into the appropriate number of columns according to your design.
Builder Elements
Each column that you've created needs to have content. Content can be text, image, video or links. In Fusion Builder content can also be one of many blocks available as shown below:
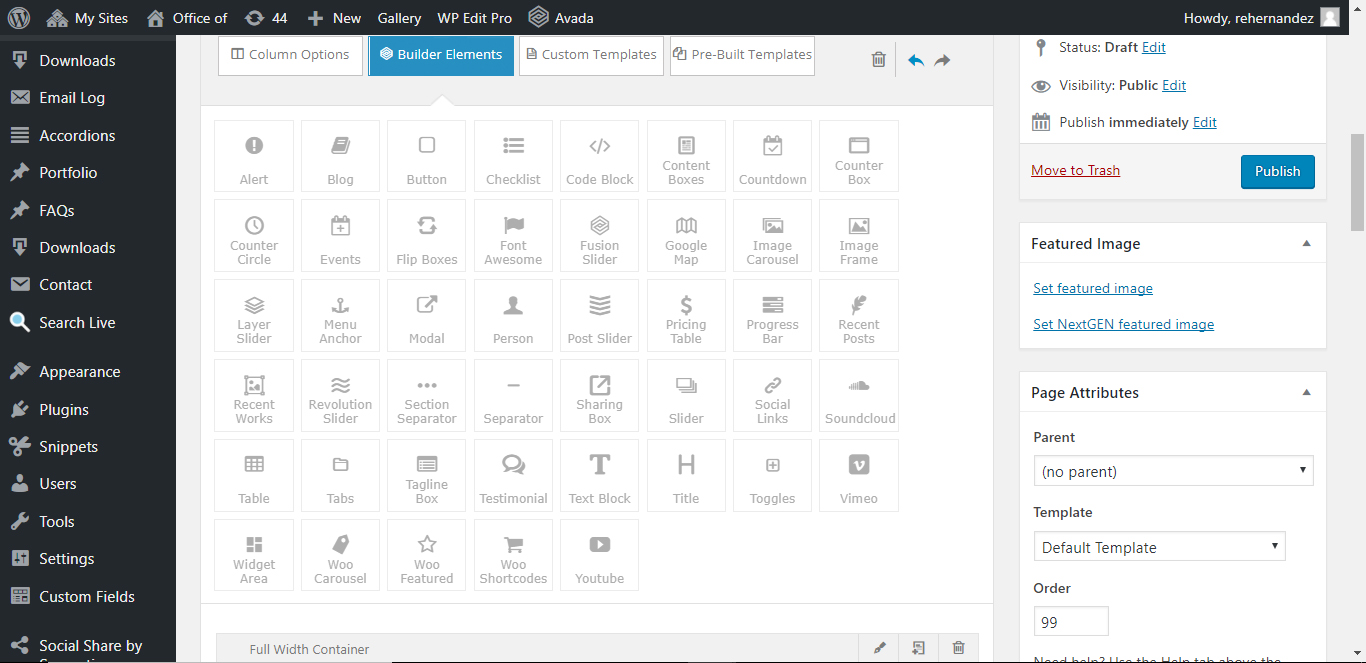
It is beyond the scope of this guide to explain each content block in detail. For further information you can view the official video tutorials of Fusion Builder in the Fusion Builder Guided Tour and the full Fusion Builder Documentation. In our tutorial we will place An image, text and hyperlinks side-by-side.
The Image Frame
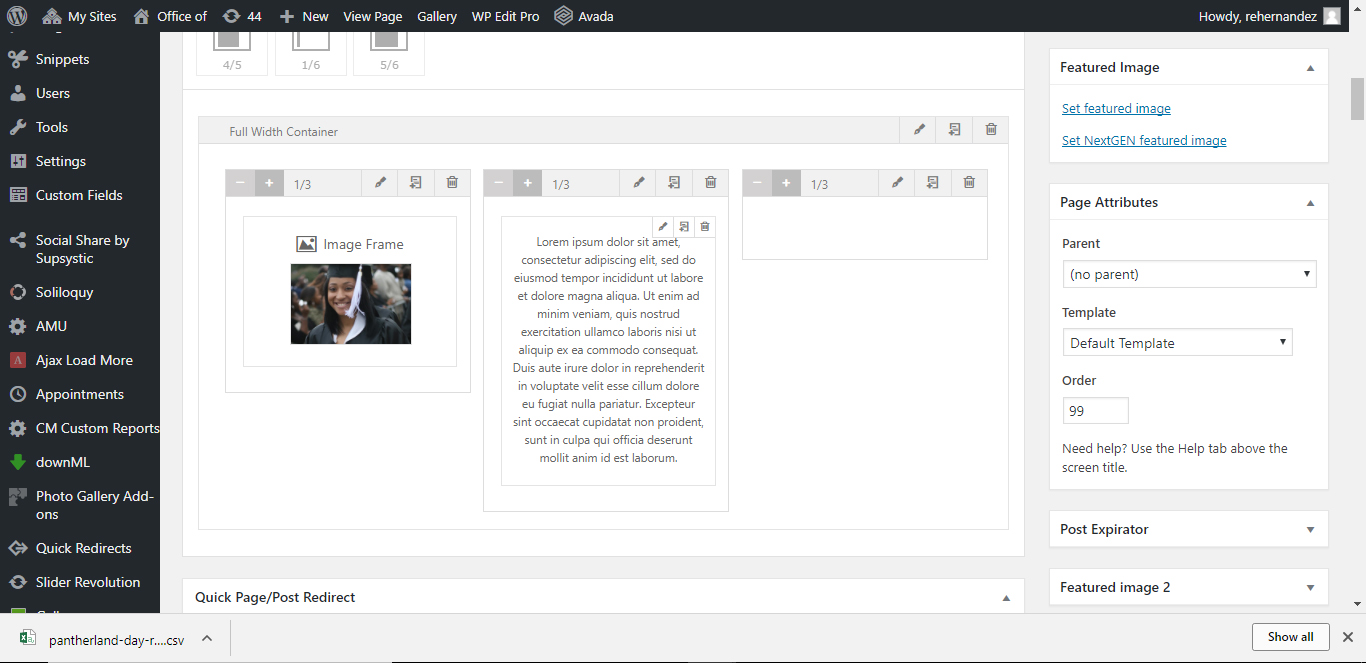
To place an image onto the page simply drag-n-drop the block labeled Image Frame into the first column. When you hover over the content block, you have a pop-up menu with the option to Edit Element, Clone Element and Delete Element. Choose to Edit the Element. 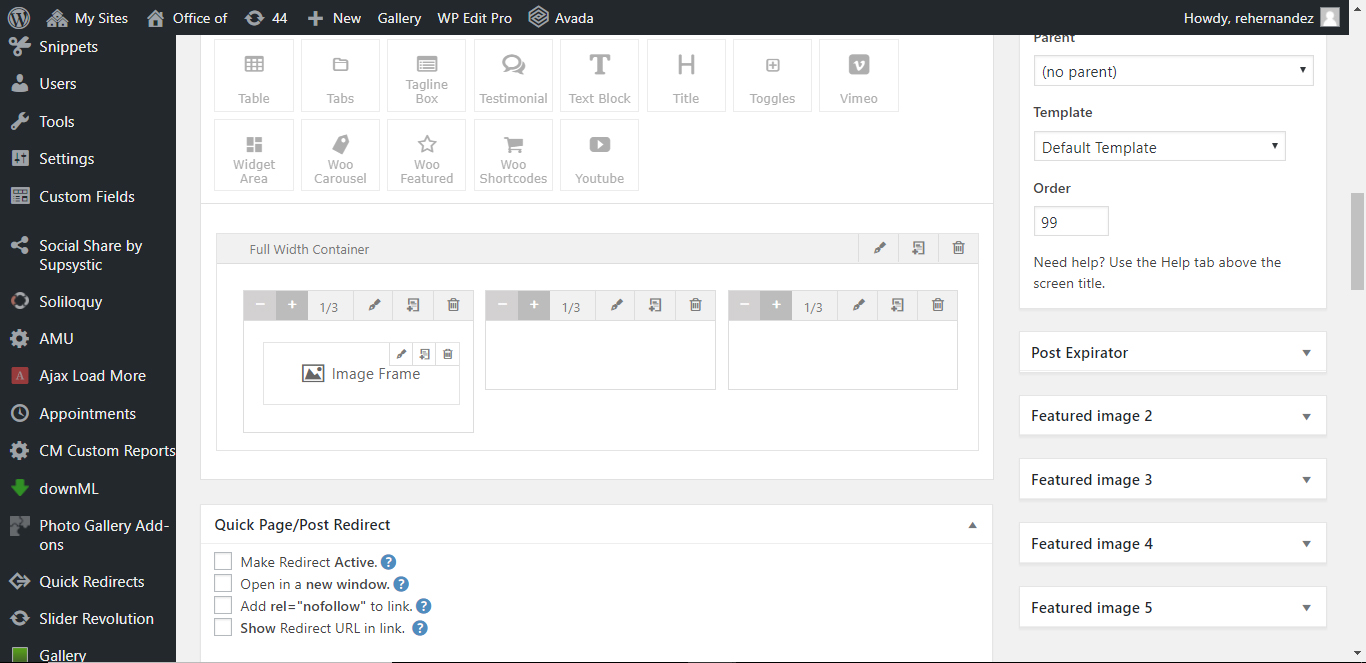
When you edit the image frame, look for a section titled Image and click on the button on that section titled 'Upload'. This will open up the Media Library where you can upload an image from your computer or select an existing image from your media library.

Once your image is selected you may click on the button Insert into Page to load the image into the Image Frame block. In the Image frame setting you will notice a box for Alt text. Place a description of the image on the Alt Text text box and click the Save button. 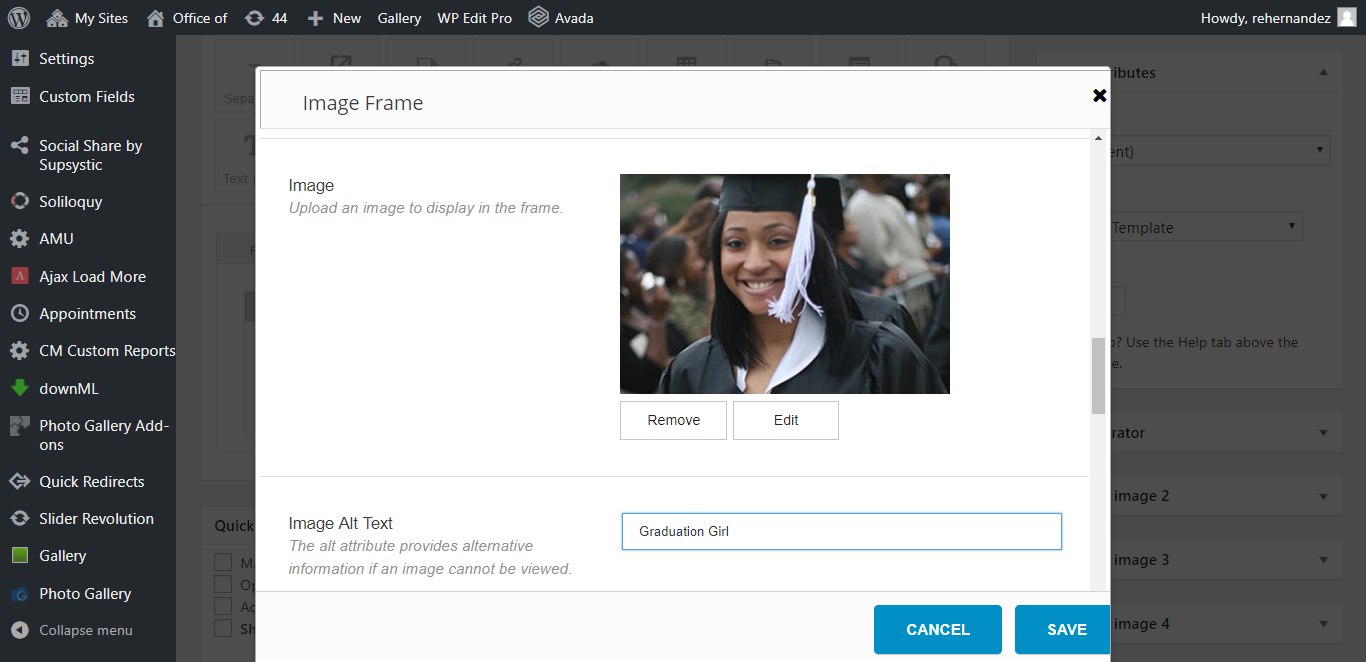
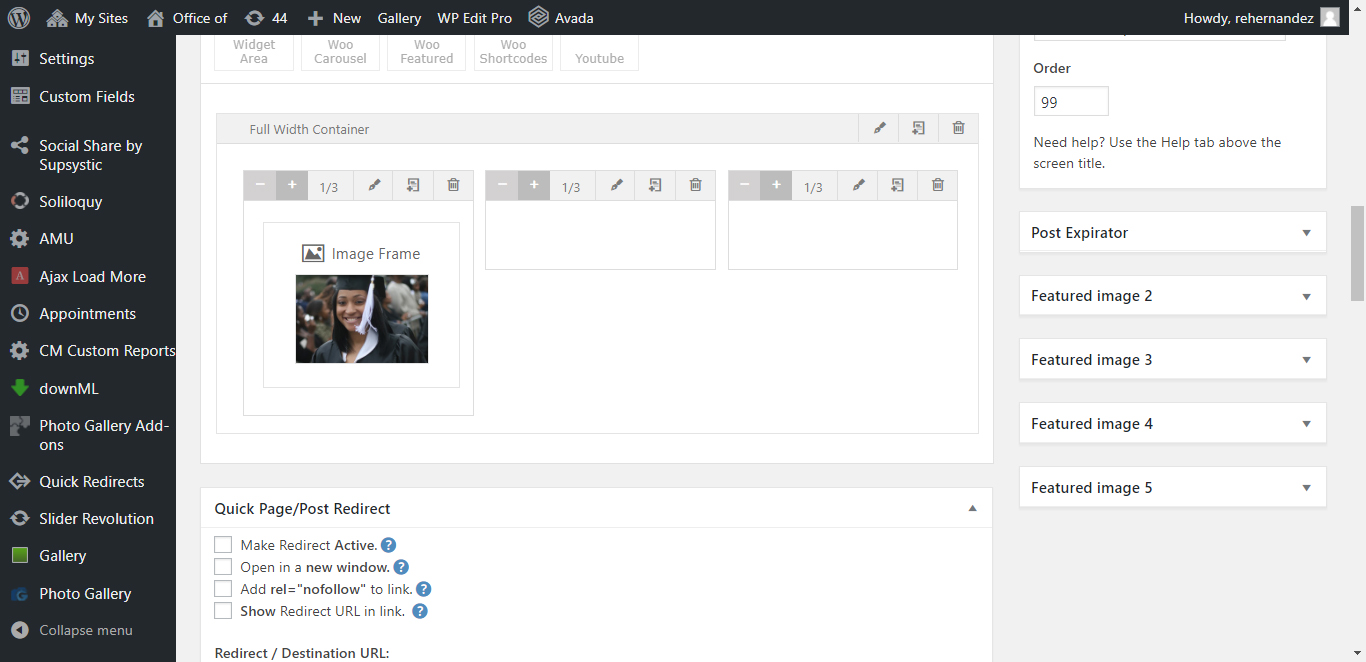
The Image Frame block now has an image
Adding Text
To add text onto the second column, drag-n-drop the block labeled 'Text Block' to that column and click on the 'Edit Element' option that appears when you hover your mouse over your block. You may place any paragraph in the editor and click save when done.
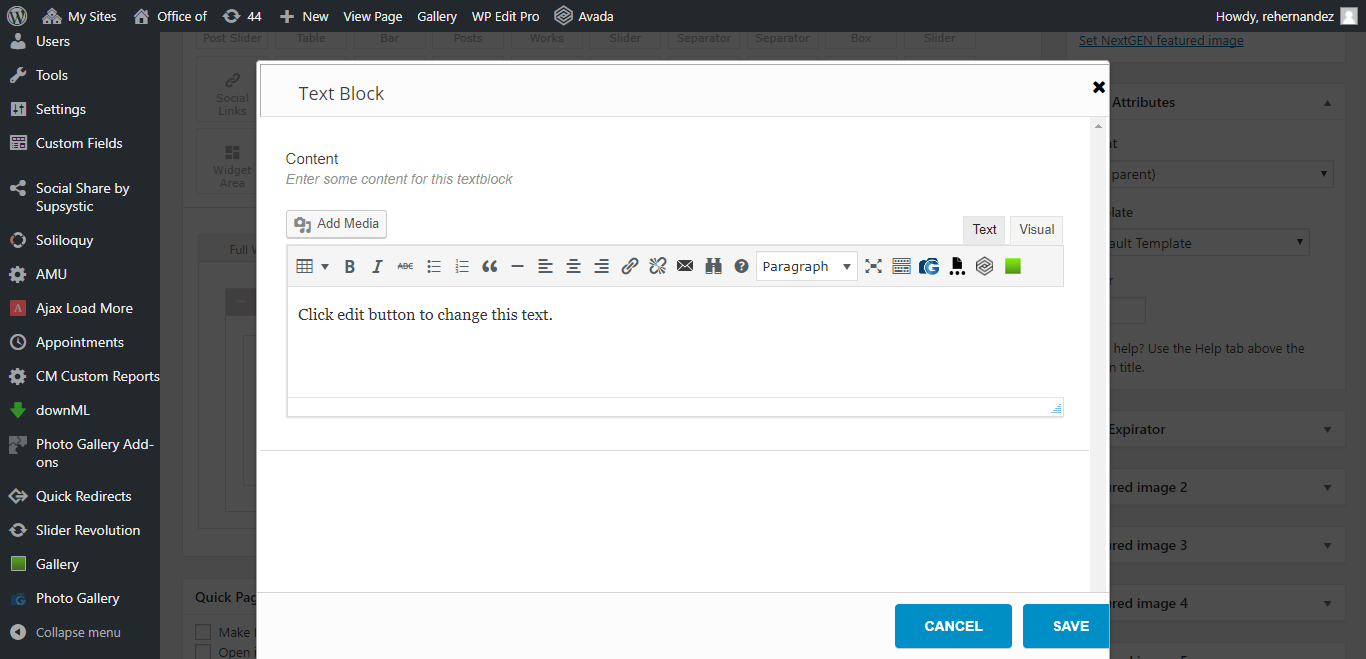
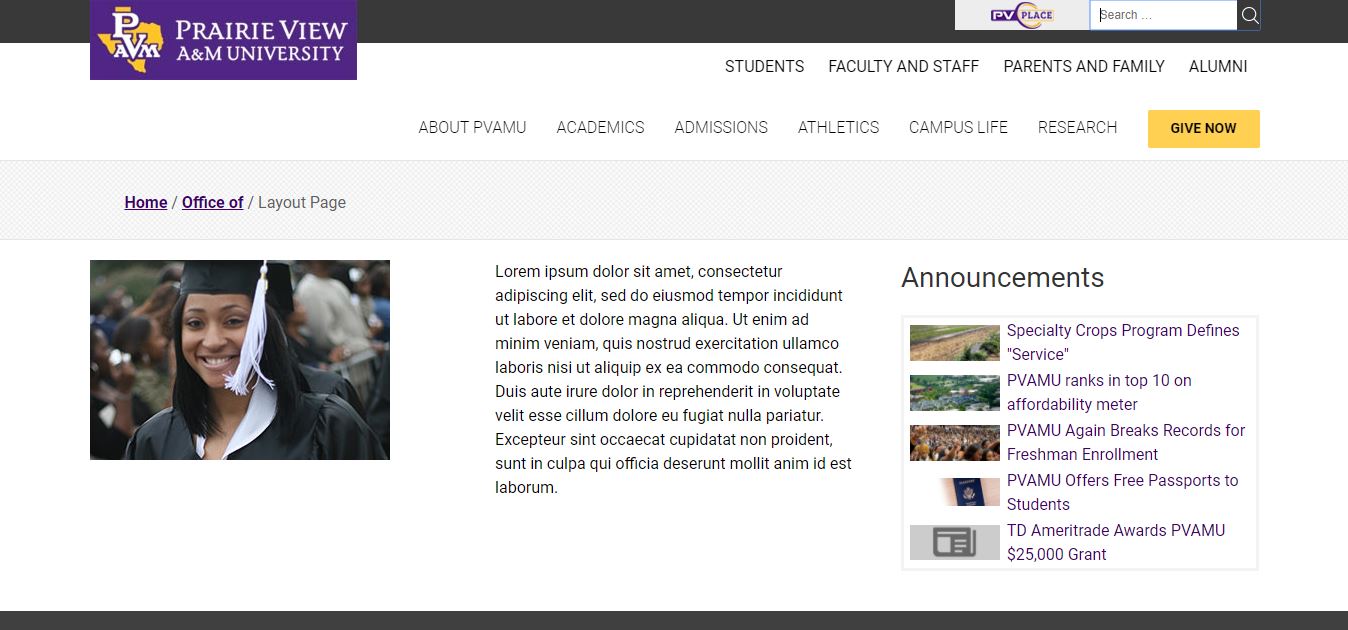
For more information on how to use the WordPress editor please refer to the WordPress Basic Training Manual. The results of having an image alongside text in the editor is shown below:
Posts on a Page
We can make a list of posts visible on a page by adding text called a shortcode. As a security precaution, running PHP code inside WordPress content is forbidden. To allow dynamic interactions with the content, Shortcodes were presented. When a shortcode is placed in the editor, the live webpage replaces the shortcode with the service that the shortcode's programming is meant to do. We will place a shortcode on a Text Block so that a list of Posts appear on the page.
Follow the steps noted in the Adding Text section to place a text block in the third column. When editing the block, the text that will be typed is
![]()
- A shortcode is always placed within square brackets [ ]
- The name of this shortcode is pv_display_posts which calls the web service to display posts on the page
- The title parameter will place a title above the list of posts that will show
- The limit parameter will limit the number of posts to display
- The category attribute tells the service to only display posts that are categorized as List. This category is a filter that displays only the posts of a certain category. In case the category parameter is omitted, all of the posts are displayed regardless of category, up to the limit.
Once all three columns have content the page is published and the result is